~~~~~~~~~~~~~~~~~~~~~~~~~~~~~~~~~~~~~~~~~~~~
August 1, 2011 @ Grandma's Guide to Life
Guest Post: SUMMER GRILLING from Cookin’ For My Captain
 When it comes to grilling, it is presumed that it’s the man’s area, you know, when they all stand around the grill at a BBQ, drinking beer. No women allowed. At least, that’s what it always has been like around here. I do the “cooking inside stuff” every night anyway, but he would always do the grilling part. Then my husband started his masters, which included night classes. So that was my chance to try my hand at grilling. And you know what? It’s so easy. (maybe that’s why it’s always been a “guy” thing!) So I’m going to give you a few tip and know-hows that will WOW you man at your incredible talents…at the grill. Not to mention how much your taste buds are going to love you!
These are not full descriptions (look in a dictionary if you want them), just a brief now-how to make it look like you know what you’re doing! First things first…
Direct heat, and indirect heat. Seems pretty simple, right? Sure it is! You just need to know when to do which one. So Basically….
DIRECT HEAT: Cooking directly over the flames. This has shorter/quicker cooking time.
INDIRECT HEAT: Cooking on the grill, with the flames/heat on the other side. Used for longer cooking time and smoking. Turn on half your burners, and set your meat on the other side with a drip pan underneath.


(1)This is a pork tenderloin being cooked on indirect heat for a long amount of time (notice the drip pan). There is corn wrapped up in that foil. I learned this night that ANYTHING wrapped in foil, need to be directly over the heat. The butter didn’t even melt…ooops.
(2) Cooking steak over DIRECT heat, uncovered (charcoal grill).
MEAT THERMOMETERS. Don’t try to guess how “well-done” your steak is. Get an instant-read thermometer and be right-on every time. And then hide them before serving and act like you’ve been doing it for years.
THE STEAK. A good cut of meat is always top business. I personally believe that salt & pepper is the best way to serve it. But whatever way you go for flavors, make sure you leave it out at room temperature for at least 30 minutes before grilling. And then let it rest for 10 minutes before cutting into it. If using salt & pepper for flavoring, rub the steak down with salt and then let it sit. It starts breaking down the fat and make it all the more tender to eat.

Steak at room temperature, ready to go on the grill (notice the deep red color!).
CHICKEN. Marinades for grilled chicken should take the upwards of 2 to 4 hours to soak in, otherwise it’ll be lost to the flames. Do not sit chicken out on counter prior to grilling. Most chicken is cooked on direct heat, but when cooking a whole chicken (like beer can chicken) indirect heat is used. A good recipe will clarify which way to cook it.
FISH. Fish is a very delicate item. Most grated grills are not suited to cook it. If you don’t have a professional kitchen, here is a simple trick. Use a flat, jelly-roll style disposable foil pan, or form a shallow pan out of aluminum foil. Spray a little with oil, and then set right over the grates where the flames are. Then cook the fish on there—you won’t lose any little bits to the flames!


At many camping sites, grills are set up for the camper’s use. There is a “flat” side to them that always seem like a waste of space…until you cook fish. It can be very handy!
COVER or UNCOVERED. Most of the time while cooking on a gas grills, recipes will call to close the lid while cooking (aka COVERED). However, when using a charcoal grill, the majority of the time, keep the lid off (aka UNCOVERED). This is due to the intense heat from the coals, and the oxygen needed to keep the coals burning. Again, recipes should clarify—but if they don’t, try these tips.

“Beer in the Rear” chicken is cooked on indirect heat
CHIMNEY: I’m not talking about the thing Santa climbs through at Christmas! This little gadget is a wonderful tool when using a charcoal grill. I personally like using natural, no chemical wood chips—but it can be a pain to get started. With the chimney, it lets the coals/chips burn and gets going all together, and when they are “grey” dump them out into the grill and whooola! Worth the few bucks.

So I really hope you enjoyed these few tips that I have learned in my cooking adventure. There are so many more things to learn about grilling, but I hope this sets you in the right direction.
I have many grilling recipes, so I hope you can stop by and check them out.

About the author: My name is Carolyn, a wife to a soldier, mom to 2 red-heads, Christian and an artist with a love for cooking and writes Cookin’ For My Captain. My family faces many challenges in our daily lives , like living in so many different areas, finding out what the commissary (on base grocery store) decides to carry or not, being in the middle of nowhere to get anything good or exotic, to the government shutting down and refusing to give a pay check. My blog looks at the daily balance between all the above. I’m by no means professional, and I’m still learning so much!
~~~~~~~~~~~~~~~~~~~~~~~~~~~~~~~~~~~~~~~~~~~~~~~~~~~
May 31st, 2011 @ Make & Takes
Butterfly Tea Party Birthday
Guest post by Carolyn of Cookin for my Captain
Ever since that day I found out I was having a girl, I knew I’d throw her a tea party for one of her birthdays. This year was the one! We are in a beautiful area, all her school friends are within a 2-block radius, weather is nice, flowers are blooming—it would be silly not to!
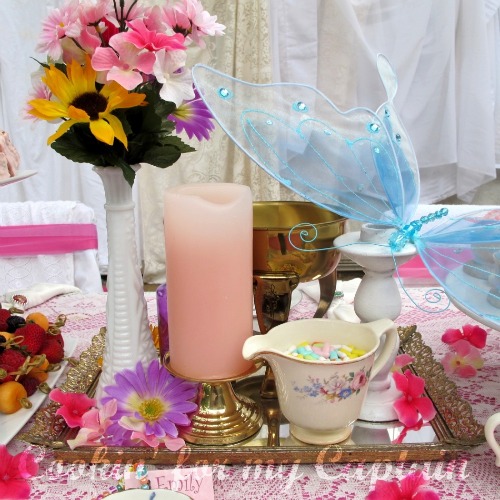
But this also means I’ve had years of collecting and gathering of tea-party “stuff.” Every time I went into a thrift store, I looked for tea-cups with saucers that went together, and other tea-party random items. Most of my search, however, was in the last few months. So it is possible to throw this party with enough planning and time. Patience is the key…and so is spray paint.
When looking at thrift stores, make sure you don’t over pay. For a kids’ tea-party, it doesn’t need to be gold or silver. I keep an eye out for candle holders especially. They can be used so many different ways! And never look at the COLOR of things. It’s easily covered up with spray paint! Also look for birdcages, tea pots and trays. Brass is a good “fake gold.” Little girls will never know the difference.
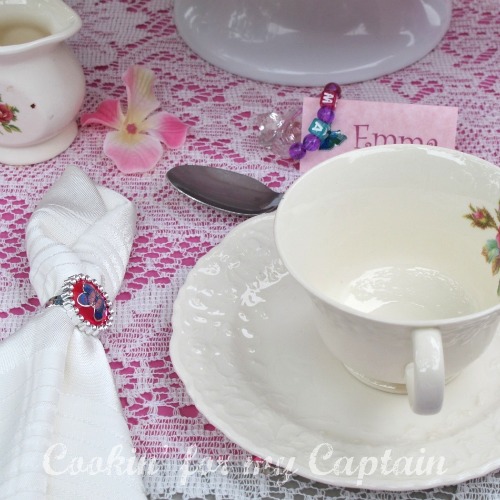
When I find tea-cups, I usually spend about $0.50 [fifty cents] each (per plate, per cup) and NO MORE than $1.25 each. Don’t look for multiples in a set; keep the eclectic look to it. Other items such as candle sticks, baskets and such I keep around $3.00 or less. Don’t be discouraged if you don’t find anything—just try another store or come back another time.
My other tip: ask around! My mother ended up having a huge bin of lace tablecloths and other lacey stuff. And then she let me keep them! And even if that person won’t let you keep them, borrow them! Lace tablecloths are not an easy come-by item, so when you do find them—get them!
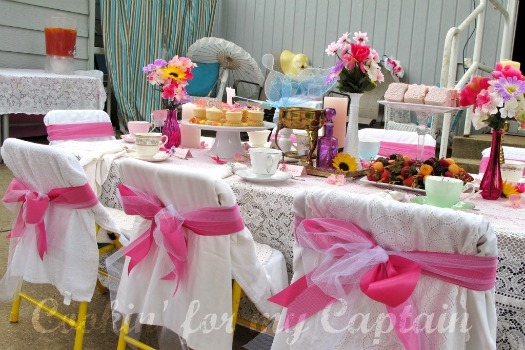
Decorations: When your surrounding might not be “pretty,” think outside the box! We have a very ugly shed, so I draped lace and white tablecloths in front of it. It makes for a much better background in pictures!
The table is a really easy thing to think about decorating, just don’t forget about the chairs. I draped a white pillow case over the chair, then used ribbon and tulle to make a pretty bow. Its was that simple!
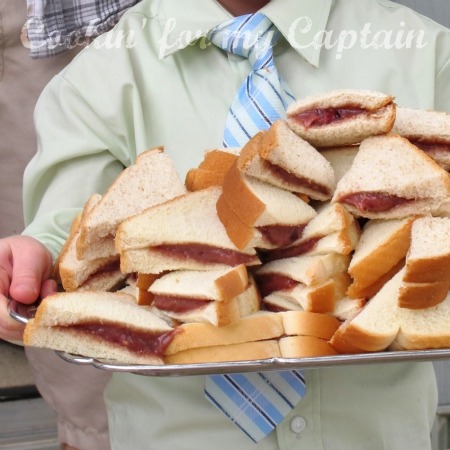
Food: Now, don’t forget the food for the party! Think simple, yet creative. I let my daughter decide what to do. She loves peanut butter and jelly sandwiches and fruit. So I made miniature fruit skewers, PB&J mini sandwiches, and then I also used Little Debbie snacks! When you take them out of the wrapper, no one will ever think they are store bought!
If you have a little or older brother, or a really cool dad, let them serve the food. My son (younger) thought it was the coolest thing. He went around and served the girls sandwiches!
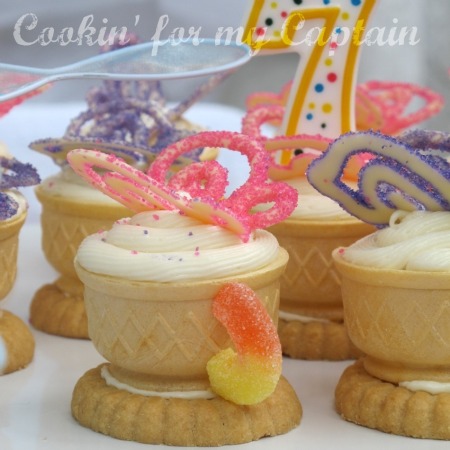
Cake: Now for the best part, the “cake.” I saw this idea on a blog [I didn’t save the URL—so sorry! It was a wonderful idea]. I have the recipe back on my blog. Learning from my mistake: make these the day of the party! I made a batch early, and by party time they were soggy. So to keep the tea-cups fresh and crisp, have everything ready and assemble before party.
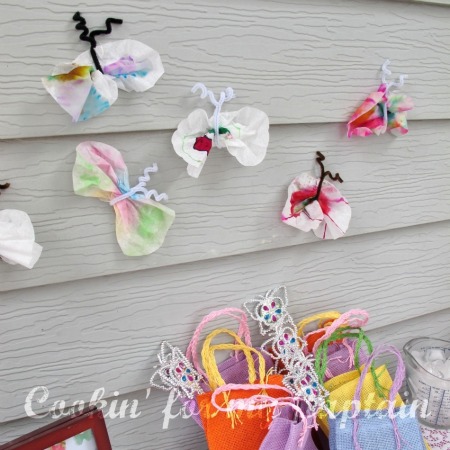
Crafts: For birthday parties, I like have a craft and a treat. For the craft, I had the girls color on coffee filter, then brush water on top and it makes a really pretty effect. Once dry, bunch them up and tie pipe-cleaners around them and whoooola!
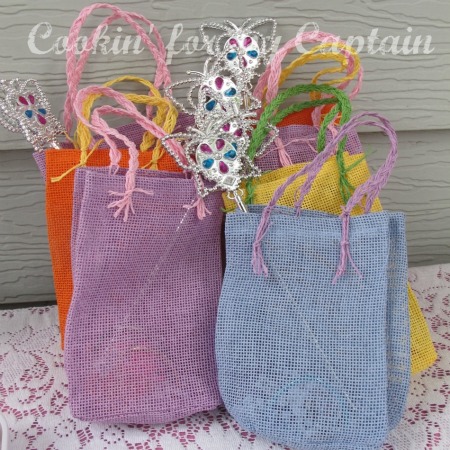
Treat Bags: The treat bags were also a collection of clearance items. At the end of the party, the kids got to hit on a piñata and used their bags to catch the candy. I kept everything with butterfly theme: wands, butterfly bubbles, a few jewelry pieces like bracelets and necklace. It’s the little things that count!
A few more things:
- Keep in mind parents and siblings that come too! I made a “parents” corner with paper plates and extra tea so they can sit and enjoy the party as well.
- Have a schedule of “events” to keep the party rolling.
- Stay calm and relaxed. You will have a much better time if you do.
I hope that you enjoyed seeing the tea-party! I had a wonderful time planning and then putting this post together. It made me replay all the fun we had. And thanks to the Make & Takes crew for featuring me!
 My name is Carolyn, and I’m an Army wife and a SAHM of 2 beautiful redheads. I have a major in art, but because of all the moving around we do, I find creative ways to express my artsy side. I love cooking especially, and really enjoy trying new things, letting my kids join, and throwing parties. For more of my recipes and ideas, visit and follow along my blog.
May 29th, 2011 @ Makobi Scribe
GUEST POST | FORT LEONARD WOOD, MISSOURI
POSTED BY ON MAY 29, 2011 1 COMMENT
My name is Carolyn, and I’m married to a wonderful 15-year veteran Army Man. Being said, we have lived many, many, many places. Our advice to everyone we meet, especially the new-to-military people, is don’t let anyone TELL you what a base is like. Sure, take advice on which neighborhoods are safer, which schools are better, ect.. But don’t let anyone tell you “That post is horrible!” If someone says that to us, we smile and say “we’ll see” =) Our last duty station was Fort Bliss, El Paso Texas. See? I bet you all cringed. Its a beautiful city with so much to offer…but that’s a different story. We got stationed at Fort Leonard Wood for a career course and its commonly know as “Fort Lost-in-the-Woods.” And it is, really. Just a Wal-mart and Cracker Barrel. But the post is absolutely beautiful and provides so many adventures to those who look. The first week we got here, we found the “Natural Springs” on the Big Piney River.
 The first week we got here, we found the “Natural Springs” on the Big Piney River.
 And you don’t even have to leave post. The fishing season had a week left, but we got it anyway. We caught so many fresh trout (for what’s allowed on the permit) and had many delicious dinners–that entire week.
 My kids are right at the age, it is so much fun. You even get to walk on a bridge over where this spring comes up.
 Millions of gallons are poured out a day into the Big Piney River, and the rangers keep it well stocked. Bugs can be bad sometimes, but just bring bug spray. This is a beautiful hidden gem for this area, and it shouldn’t be missed. We are looking forward to fishing season to open again–I have several trout recipes I want to try this year!
Keep an eye out this summer for some wonderful trout dishes!
Carolyn -Cookin’ for my Captain
