Showing posts with label tips. Show all posts

Thursday, November 22, 2012

Thanksgiving Recipes & Ideas


Over the couple years of blogging, I've collected a great number of recipes, tips, tricks and more. I've decided to spotlight the recipes and such that as good for the masses! Enjoy this years festivities!

Tender and Juicy Turkey/Chicken

Alternative to a stuffed Turkey: Grilled Stuffed Pork Loin

Sides: Corn Crisp

Corn Casserole (I make this every year!)

Ultimate Mashed Potatoes

Potato Soup

Baked Potato Salad

Camemebert Cheese with Peach Chutney & Toast

Desserts: Apple Dumplings

Apple Streusel


Friday, March 2, 2012

February's Tips & Tricks Wrap Up

Well, I didn't do as many T&Ts as I planned, but I just got too stressed with my last term for school. So I hope that ya'll enjoyed the ones I did post, and I'll try to squeeze more in on the upcoming months. Here is a list of them all so you don't need to scroll down to find.


Tips and Tricks:

Here is an awesome poem that Martin with Anita Poems wrote for me:

Tips & Tricks


It all began with an experiment,


that turned out delicious and quick,


Cinnamon rolls in the waffle iron,


if you don’t spray, they’ll stick.


Shredded chicken,


makes delicious pot pie.


Initially a bit skeptical,


so she decided to try.


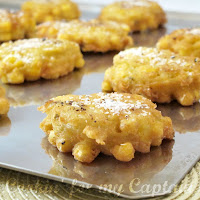
Don’t over mix the batter,


make sure you keep it cold.


That’s the secret to making,


sweet and sour chicken that’s gold.


When snapping asparagus,


each piece you must bend.


Cook the top part,


and give the rest to a friend.


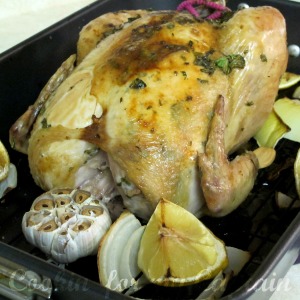
If you want juicy chicken,


let the baby just sit.


She’ll become real tender,


and a dinner table hit.


To keep ginger longer,


simply just freeze.


If you think about it,


it’s much healthier than cheese.


Use lemon peels,


to make jello shots.


No need for plastic,


with green in your thoughts.


Various fruits and veggies,


are known to naturally heal.


They’re better than pills,


you’ll see how you feel.


Thank you Carolyn,


February was deliciously smart.


We’re all very eager,


for a new month to start.


by anitapoems.com


How awesome is that!? LOVE IT!
Next month: SMOOOOOOOTHIES! Stay tuned! =)

Friday, February 17, 2012

T&T: Freezing Ginger

One of my MOST favorite smells in the kitchen is ginger. Before I learned this trick, I threw out most of the root after using some of it in my recipe because I wouldn't use it again for a while, and it doesn't keep for long. Then I learned this trick. Ginger in the house has never been toss out again!

T&T: Freeze the ginger to keep it longer.

There are a few things you need to do to the ginger before you freeze it.

  • Cut off any of the "nubs" on the sides.

  • Peel the entire root.

  • Place into a freezer bag


  • So when you go to use it, don't thaw it out. Take it out, cut off a chunk and put the unused piece back in the bag and into the freezer. My favorite way to use it is using a shredder. Ginger is extremely easy to shred while frozen.

  • Ginger is also really good for your health. So shred a little into you tea, or any food dish. Its a wonderful flavor to use on practically anything!


Thursday, February 16, 2012

T&T: Tender and Juicy Chicken

Have you ever wondered how restaurants and "professionals" always get their chicken so tender and juicy? I have before. But now I know the secret! And I'm sharing it!

T&T: Let chicken sit for 5 to 10 minutes before serving.

  • Yes, you read that right.  Letting the chicken sit for a few minutes lets the meat relax and the juices flow back into the chicken!


At restaurants, chicken is usually one of the first things done after ordering, that way it can sit a few minutes on your plate before the waiter brings it out to you.

Try this! And as long as you don't over-cook the chicken beyond recognition, this will always work. PLUS, if you chicken is "slightly" under-cooked, it gives it a few more minutes to heat up and finish cooking in the center.

  • For small chicken breasts and tenders, cover with foil so not all the heat will escape. For larger birds, like turkeys, you don't need to cover it with foil. However, covering it won't take away from this tip.

  • MISTAKE: Cutting into the chicken to check if it is done. By cutting the chicken, it breaks the meat strands and prevents the juices to travel into that direction. Follow cooking times to make sure it is done. Wait 5 to 10 minutes before cutting into it, and after that, cook it a bit longer if its under-cooked.

  • One more thing, when cooking a whole chicken or turkey, adding lemons, onions and/or garlic that release moisture when cooked, helps keep the bird juicy as well! This way its not drawing moisture from other parts of itself and creating "dry" pieces. Not to mention, its adds another level of incredible taste!

Thursday, February 9, 2012

T&T: Fresh Asparagus

Asparagus is one of my favorite veggies to eat. There are so many ways you can cook it, but first you got to know how to pick it.

T&T: Pick fresh Asparagus
  • Whether you like them thin or thick, look for consistency.
   
You want to make sure the bottom of the stalks are about all the same size. This will make sure they cook evenly. Also check the tops, make sure there isn't any "soft" spots or mold.

This part can be the hardest for most people to do. Not because you need skill, but because you need to get over the "waste" feeling. I always CUT the bottom of the bundle and then cook..but then there is always a "stalky/bark" taste while eating. Thats because you didn't cut all the pieces at the right spot.
  • "Snap" the stalks individually so there are no rough bites.
   
Grab both ends of the asparagus and gently bend. The asparagus will snap at the point the tender and bark-y sides meet. (I know, very technical words!) For some pieces, it might be right in the middle. Remember to keep the end with the "tree tips." This is where it might seem to be "waste"... your pile to throw away could be bigger than you imagine. But look at it this way, there won't be any waste on the plate!

The easiest and fastest way to cook the asparagus:

  • Snap the tips, place in glass dish, sprinkle with salt (and pepper), add about 1/2 cup water, cover with plastic wrap, and microwave on high for 5 minutes.


"Green" vegetables can be tricky to cook. They produce chlorophyll, which turns them green. When overcooked, it becomes a dark brownish green and slimy. Cooked just right, they will be a bright green and still have just a little bit of crunch to them. I always use fresh asparagus, "canned" asparagus.... *shudder* there is no need when you can do this "easy" way in 5 minutes!


So there! Impress your family with fresh, perfectly cooked asparagus!

Tuesday, February 7, 2012

T&T: Deep-Frying Batter (Sweet & Sour Chicken)

Have you ever wondered how the batter in most restaurants and how the professionals get the crispy, delicious crust around whatever is being deep-fried? Well I have got the tip for that. The trick? Don't over mix the batter and keep it COLD! The extreme difference between the hot oil and cold batter make the perfect crispy crust.

T&T: Mix gently, and keep the batter COLD.

  • When mixing the ingredients for the batter, use chop sticks and only mix until everything is moist.


  • Make sure the oil is hot and at the temperature its supposed to be at. And don't crowd the pan, crowding causes the oil to cool down and takes longer to heat back up.
(for chicken, heat oil to 365 degrees F
  • Keep the batter in an "ice bath." Fill a metal bowl with ice and water, and set the bowl with the batter inside and work quickly.


  • Work quickly, and you'll get the best results!


Here is a good recipe to try this out!

SWEET & SOUR CHICKEN


Batter:
1 egg
1/3 cup milk
1/2 cup flour
1/2 tsp. baking powder
 

Sauce:
2/3 cup sugar
2 tbsp. rice vinegar
3 tbsp. ketchup
3/4 cup water
2 tbsp. cornstarch
 

Directions:
  • Mix all ingredients in saucepan. Stir over medium heat until sauce thickens. 
  • Dip meat in batter and deep fry until done. Set aside. 
  • Dip in sauce or pour over meat. Serve with rice.
  • Variation: May add pineapple, green peppers, tomatoes and toasted sesame seeds.


Monday, February 6, 2012

T&T: Shredded Chicken (Chicken Pot Pie)

I'm sure most of ya'll have seen this on Pinterest. I was actually skeptical about it, seen it by a few other bloggers, but had to see myself.

T&T: Shred hot chicken in an electric mixer.

  • Boil chicken (boneless) until cooked through then place the chicken into a electric stand mixer. 
  • Place setting on medium (make sure there is a cover to prevent flying chicken!) and in a few seconds you will have perfectly shredded chicken!

Isn't that just BEAUTIFUL? Now here is a recipe you can use that shredded chicken in!

CHICKEN POT PIE
(recipe from Pillsbury)

Crust:

1 box Pillsbury® refrigerated pie crusts, softened as directed on box
Filling:
1/3 cup butter or margarine
1/3 cup chopped onion
1/3 cup all-purpose flour
1/2 teaspoon salt
1/4 teaspoon pepper
1-3/4 cups chicken broth
1/2 cups milk
2-1/2 cups shredded cooked chicken or turkey
2 cups frozen mixed vegetables, thawed
Directions:
  • Heat oven to 425°F. Make pie crusts as directed on box for Two-Crust Pie using 9-inch glass pie pan.
  • In 2-quart saucepan, melt butter over medium heat. Add onion; cook 2 minutes, stirring frequently, until tender. Stir in flour, salt and pepper until well blended. Gradually stir in broth and milk, cooking and stirring until bubbly and thickened.
  • Stir in chicken and mixed vegetables. Remove from heat. Spoon chicken mixture into crust-lined pan. Top with second crust; seal edge and flute. Cut slits in several places in top crust. [I cooked mine in small round corning ware dishes for "individual servings"]
  • Bake 30 to 40 minutes or until crust is golden brown. During last 15 to 20 minutes of baking, cover crust edge with strips of foil to prevent excessive browning. Let stand 5 minutes before serving.

Thursday, February 2, 2012

February: Month of Tips with Recipes!

So this year, I have a new "direction" to take my blog. Each month, I will have a new "theme" to focus on. So THIS month, February, is my "month of cooking tips"! Of course, I will have recipes to go with them, no worries! At the end of each month, I will have a special feature that lists each one of them. So, sit back, relax, and learn some new things!


First "Tip and Trick" starts tomorrow!

Friday, September 23, 2011

Friday Feature

My friends, I feel like I have neglected my blog for almost a week! Luckily I've had a few recipes up my sleeve to share, but interaction has been minimal. And I'm so sorry. The internet-guy is suppose to come Saturday, so hopefully I'll have the internet situation figured out. It doesn't feel like a normal week when I don't do my "Flash-Back-Fridays" or the "Wordless-Wednesdays" hop! What would I do without a computer completely?? *sigh*

This sweet lady contacted me about doing a feature, and I jumped at the chance--what better timing? These are such excellent tips!
~~~~~~~~~~~~~~~~~~~~~~~~~~~~~~~~~~~~~~~~~~~~~~

Submitted on behalf of Primrose Schools: Early Preschool Education by Emily Patterson (@epatt1062)

The kitchen is the life of any house. It's where meals are made, and days are discussed. It can, however, be the central location for many accidents, especially when children are involved.

Everything about the kitchen can be fascinating, and children take a lot of pride in accompanying parents in creating culinary masterpieces. Children are always wanting to be more like adults. That sometimes means working with the most dangerous equipment, such as the oven and the stove, red hot pots and pans, and even the blender.

It's important to let your child participate with these tasks for their own self esteem. Therefore, here are some guidelines which will make everything easier and safer for your family:

1. Know your child's limits. Based on age and maturity level, this should be pretty common sense. If there are easier tasks, such as measuring or stirring cooler items, assign those to your youngest ones. If there are no tasks that you are confident that your child can perform safely, you can always let them pretend to cook alongside you, or give them pots and pans, with which they can make music. A little entertainment while you're preparing dinner couldn't hurt.

2. Set up some ground rules that are always followed in the kitchen. These are your basic dos and don'ts of the kitchen. Make sure the children know to wash their hands and when. Make sure they know what they are allowed to touch and what they are not. Handles of pots and pans are always to be turned in to avoid spilling any hot food on the kids. Whatever rules you can think of besides these, that are always going to need implementation while cooking, are important to be made clear.

3. Try to help your child build to their full potential. Let them start with easier tasks, and when they have mastered those, move on to more difficult tasks. For example, teach older kids to cut softer items first, and then, let them move up to harder items. Kitchen skills will prove to be valuable over the course of your child's life. As their skill improves, so will their confidence.

4. Make sure you are having fun. Cooking with children is bound to get messy at one point or another. Don't stress yourself out over spills or accidents. Try to be patient and understanding with your child, and help them find a less messy way to complete whatever task they are assigned. Make your clean up fun too. Remember, it's not really about the outcome. It's about spending time with your family.

When it's all over, and you've prepared something delicious together, make sure to compliment your little chef. Boost his/her confidence by telling them how good everything tastes and how great of a job they've done and ask them what meal they'll want to attempt next.

Check out this excellent web site: Primrose Schools
~~~~~~~~~~~~~~~~~~~~~~~~~~~~~~~~~~~~~~~~~~~~

Funny Story: My son grew up calling a knife "Sharpy" because he tended to be more accident-prone than others. He's 5 now, and has learned to call it a "Knife"....but still, "sharpy" will always be somewhere in my vocabulary!

Do YOU have a funny kitchen story? Tell me--I need a few laughs! =D
Related Posts Plugin for WordPress, Blogger...